Updating to the minimum system requirements on your iPad will prompt you to grant the Retail POS app permissions to access Bluetooth and Local Network settings on your iPad.
If declined, this will cause your printer to no longer function. To fix this, ensure that Bluetooth and Local Network Permissions are enabled in Settings > Lightspeed Retail POS (X) on your device.
This guide provides step-by-step instructions on how to install a Star TSP 100/143LAN for Windows, Mac, or iPad. Select the device you use below and follow the instructions.
Device checklist
In order to set up your receipt printer, you'll first need to make sure you have all the peripherals needed.
Cables
You will need a power cable for the printer and an ethernet cable to connect the printer to your router.
Receipt rolls
Make sure you have 80mm receipt rolls. To load your receipt roll open the latch on the top right of the printer, place the roll inside, and pull some of the paper through before closing the lid.
Cash drawer (optional)
You may also wish to set up your cash drawer at the same time, to do this you'll need a specialized cash drawer cable. This is similar looking to an ethernet cable but is smaller on one end.
-
Setting up the Star TSP100/TSP143IV for Mac
Before getting started
Print the Network Configuration and Current IP Parameters Status receipts:
- Turn the printer off
- Hold the feed button down and turn the power back on at the same time
- Release the feed button. This will print out two test receipts.
At the bottom of the second page, it will show Current IP Parameters Status. Hang on to this page and make a note of the IP Address, this will be used later.
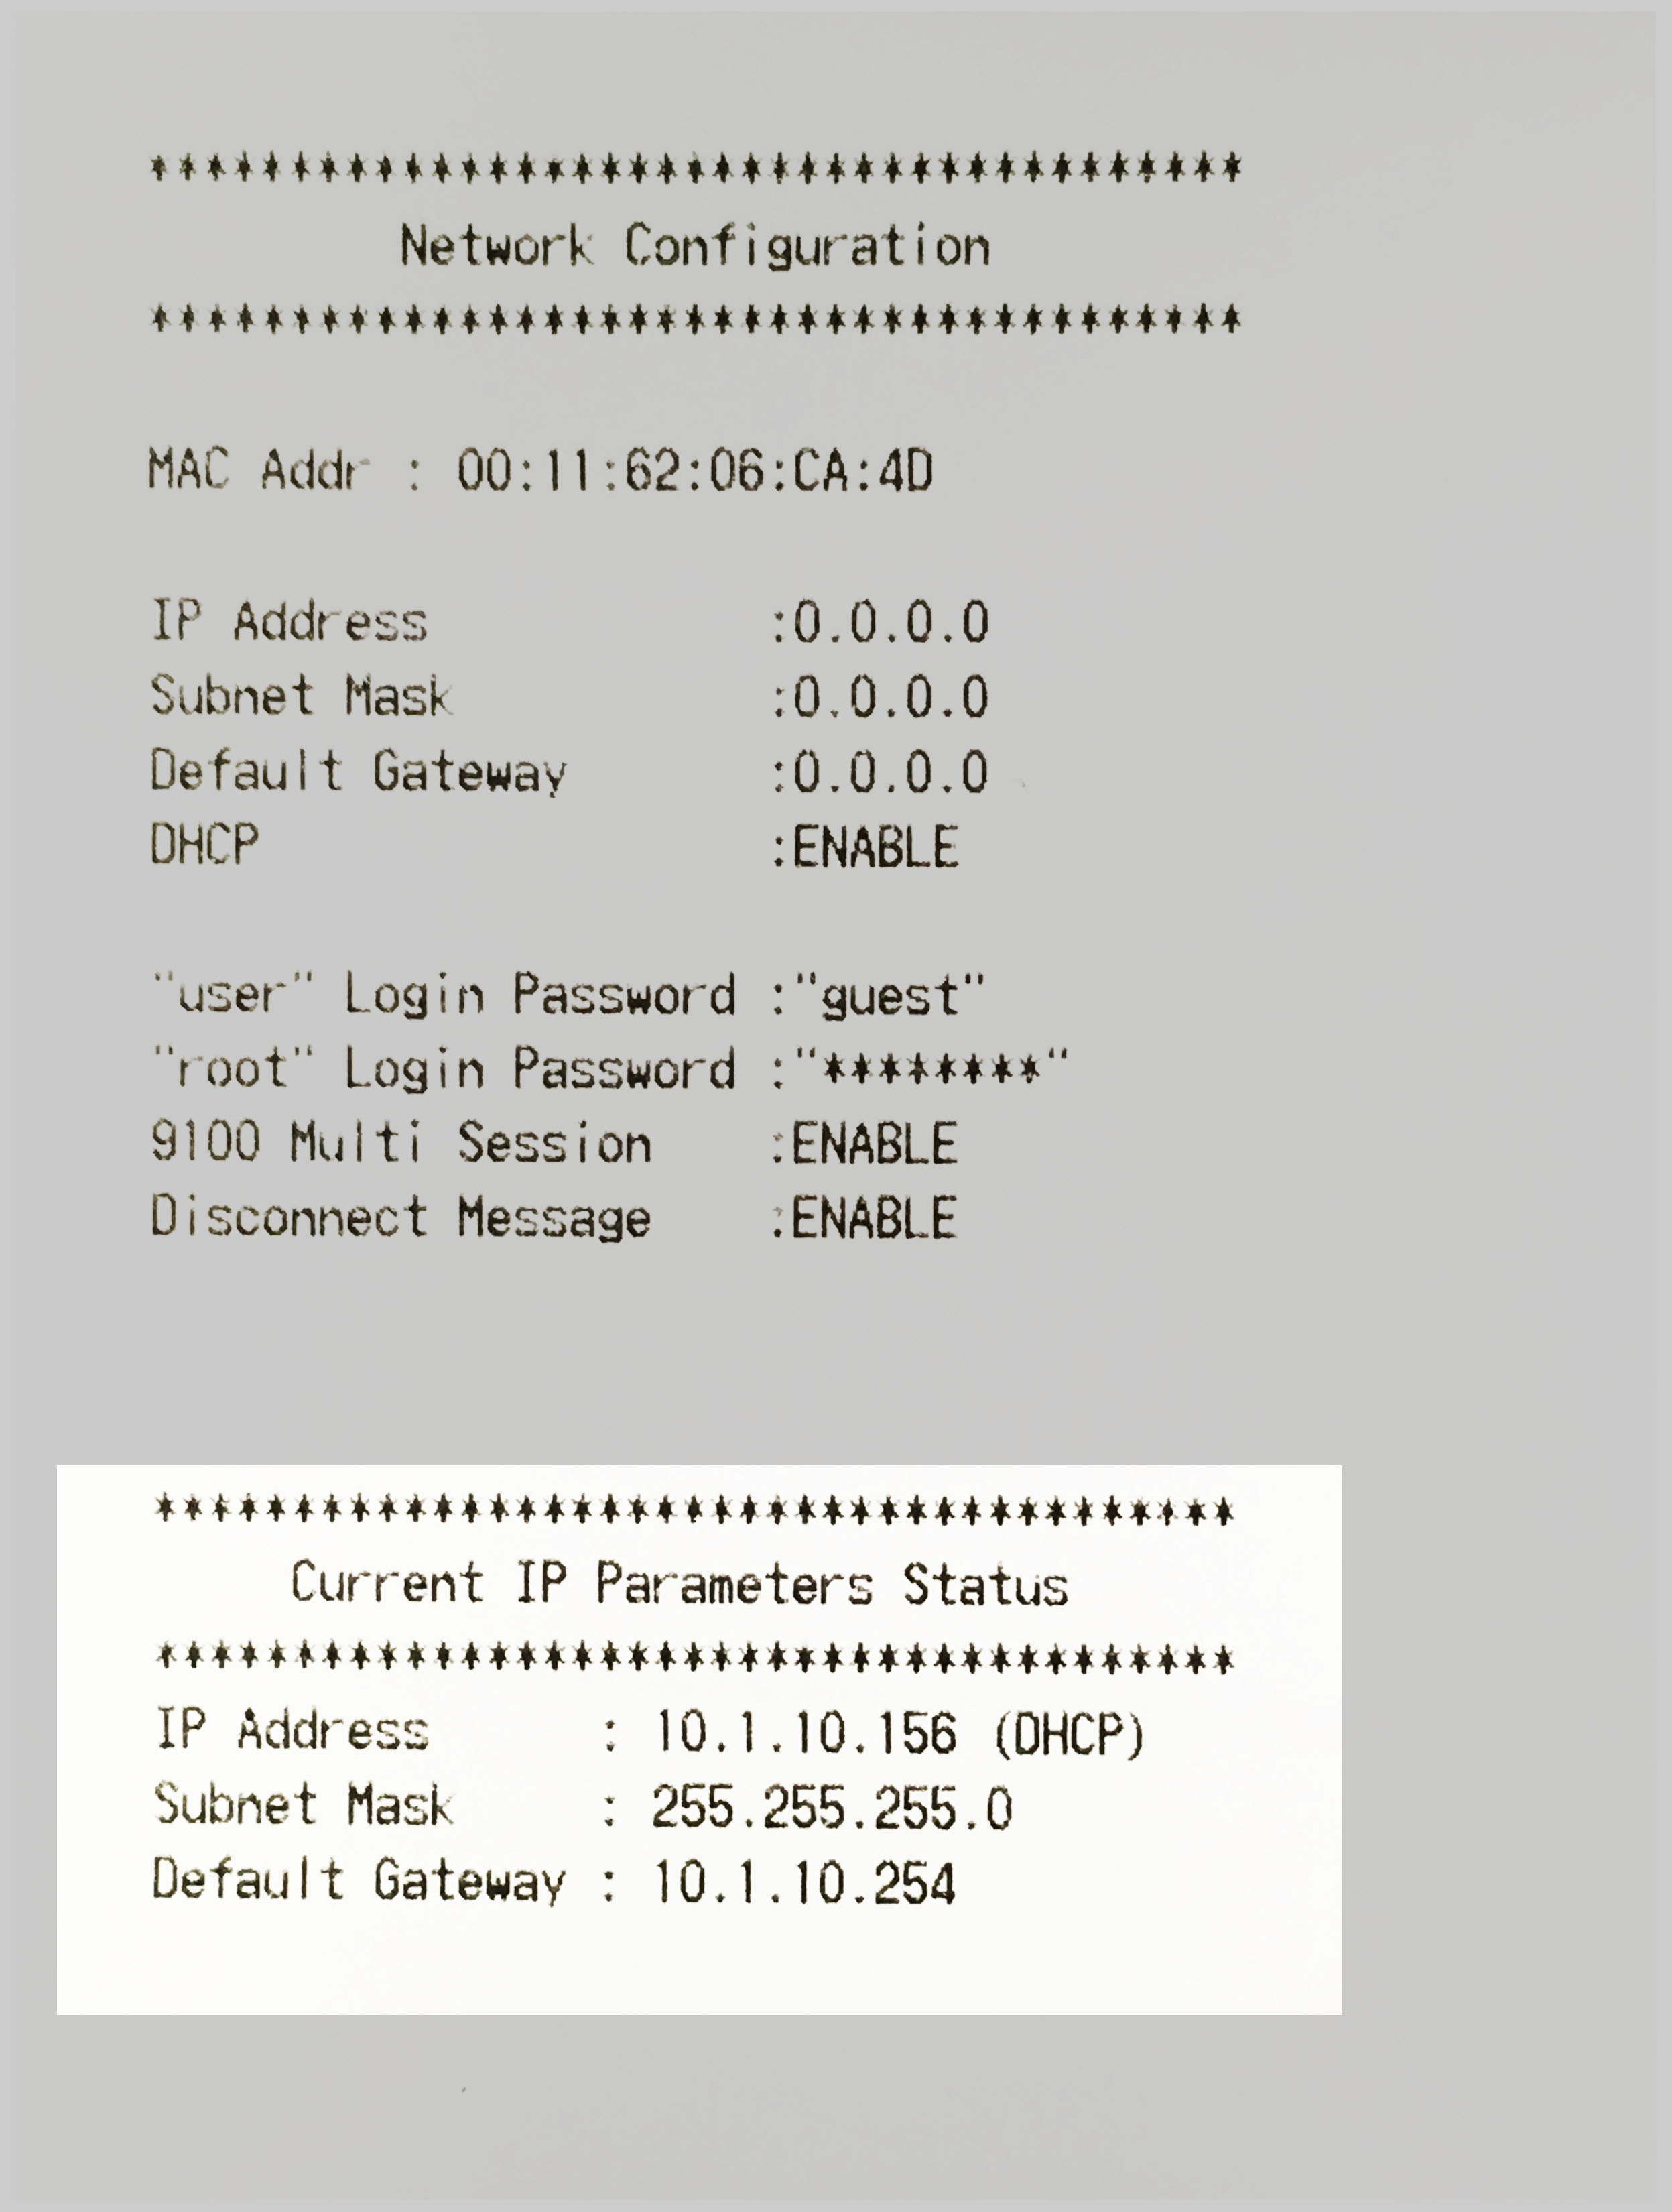
Your IP address will be different from the one listed in the picture above.
Downloading and installing the Star printer driver
Download the latest printer drivers for Mac. This is specialized software that allows the printer to run correctly on your computer. Go to the Star Micronics website.
1. Click the CUPS Driver for macOS driver to download.
2. When this download is completed, double-click the file to extract it.
Checkpoint
Not sure where to find the download? Go to Finder and select Downloads from the sidebar.
The download will also appear at the bottom of Google Chrome, click the arrow here and select Show in Folder.

3. Open the extracted folder and open the Driver folder inside
4. Double click the .pkg file here and follow the install guide instructions.
Installing your Star Printer
Now that this is complete you'll need to install the printer on your Mac.
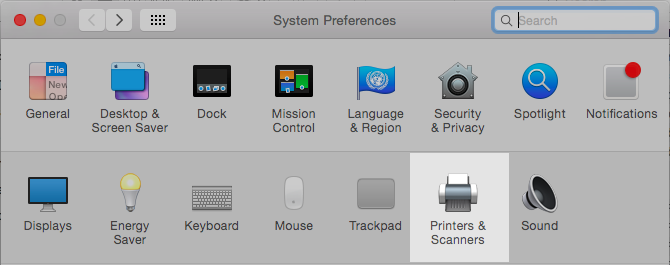
1. Navigate to System Preferences and open Printers and Scanners.
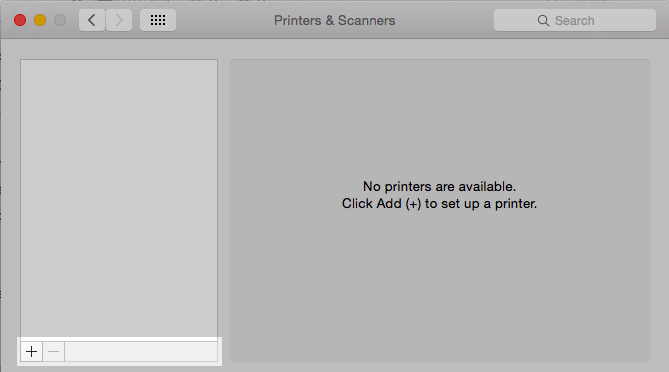
2. Here, click the plus (+) and click Add printer or scanner.
This will open an information window. Select IP along the top and follow the instructions below to fill out the form correctly:
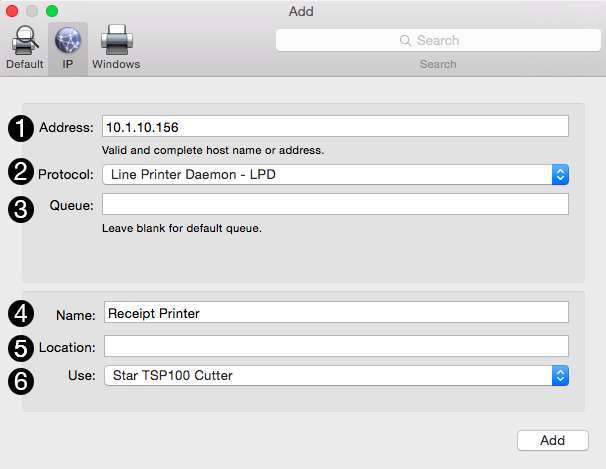
- Address: This is where you need to enter your printer's IP address. This is contained on the Current IP Parameters Status receipt that you printed earlier.
- Protocol: Select Line Printer Daemon - LPD from the drop-down
- Queue: Leave this blank
- Name: This is an optional field but if you'd like to customize the name of your receipt printer, enter it here.
- Location: Leave this blank
- Use: Select Select Software... from the drop-down. This will open up a new window where you can search for Star in the top right. Select Star TSP100 Cutter, and click OK.
Once you've put in all this information click Add. Your printer should now be set up and ready to go.
Perform a test print
Now that your printer is installed you can start using it to print your receipts in Retail POS.
To perform a test print, follow the steps below:
1. Navigate to Sell > Sales history
2. Click a sale to expand it
3. Click Print receipt
4. Select the receipt template you’d like to use
This will take you to the print preview screen. If the Star is not your default printer, select the appropriate printer from the options.
You will also want to untick headers and footers and set the paper size to 72mm - 2000mm.
If you set your paper size to 72mm - 2000mm without disabling headers and footers, the printer will not auto-cut at the main receipt
Once that's been changed you should be able to print out a receipt.
Set up your cash drawer
Once the printer is set up, you can connect the cash drawer.
The cash drawer connects to your receipt printer and is triggered to open when you finish a cash transaction and the receipt is printed by the printer.
You can manually open the cash drawer by printing a receipt from the Sales history (Sell > Sales history)
To set up the cash drawer:
1. Plug the RJ12 connector cable from the cash drawer into the receipt printer.
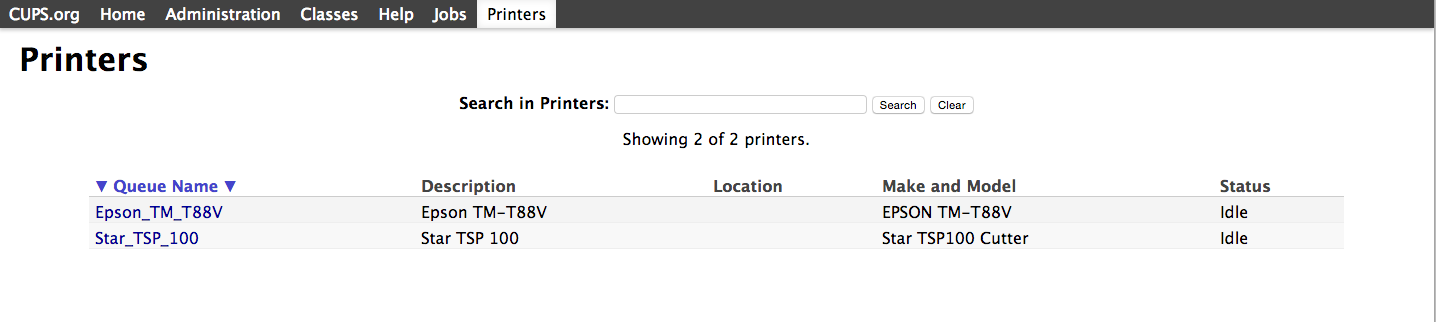
2. Go to the following URL: http://localhost:631/printers/. This will take you to CUPS, a network printing service used by Mac computers. It allows you to set up your printers on a network, and customize options such as cash drawer setup.
Receive this screen? Click here to learn how to enable CUPS for your computer.3. Once in CUPS, Select your printer model from the list below:
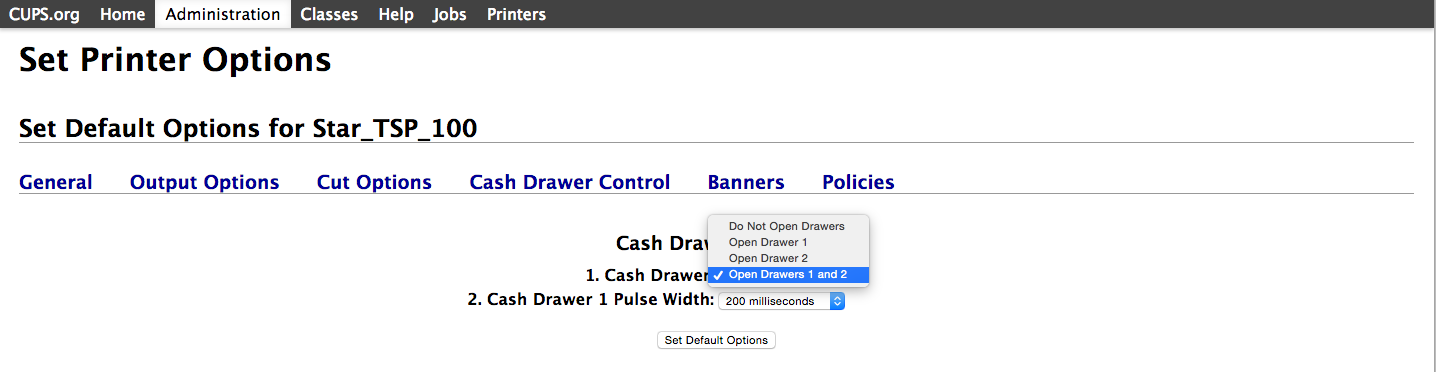
4. Select from the drop-down menu Set Default Options

5. From here, select Cash Drawer Control, choose Open Drawer 1 and 2 under Cash Drawer and click the Set Default Options button below.
Your cash drawer should now be all set to go! You can test the cash drawer by printing a receipt from the Sales history (Sell > Sales history)
-
Setting up the Star TSP100/TSP143IV for Windows
Before getting started
Print the Network Configuration and Current IP Parameters Status receipts:
- Turn the printer off
- Hold the feed button down and turn the power back on at the same time
- Release the feed button. This will print out two test receipts.
At the bottom of the second page, it will show Current IP Parameters Status. Hang on to this page and make a note of the IP Address, this will be used later.
Your IP address will be different from the one listed in the picture above.
Downloading and installing the Star printer driver
Download the latest printer drivers for Windows PC. This is specialized software that allows the printer to run correctly on your computer. Go to the Star Micronics website.
1. Click TSP100 futurePRNT Software Lite driver to download.
2. When the download is complete, go to the Downloads folder on your computer, right-click on the downloaded file, and select Extract All.
Not sure where to find the download? Go to file explorer and select Downloads from the left-hand list.
The download will also appear at the bottom of Google Chrome, click the arrow here and select show in folder.

3. After extracting the file, a new folder will open. Double-click on Autorun and follow the installation guide instructions.
Installing your Star Printer
Now that this is complete we'll need to install the printer on your PC. To do this:
From the Windows Start menu, select Programs / Apps / All apps > StarMicronics > LAN & Bluetooth Setup Tool
You may want to search for this instead. To search in Windows 8 hover your mouse over the top right-hand corner of the screen until the magnifying glass appears in the sidebar. Clicking this will take you through to a search window where you can type 'EthernetSetting'.

Using Windows 7? To search in Windows 7, navigate to the bottom left corner of the screen and click on the 'Windows start' icon. A menu will appear and you should see the search bar at the bottom.
You should see this icon appear.
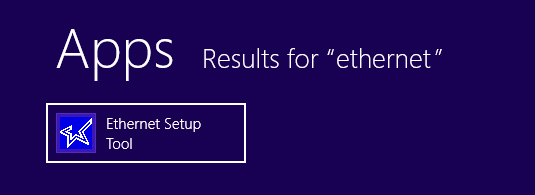
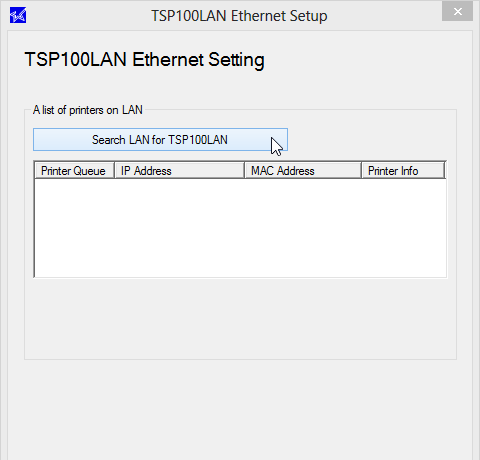
Clicking this will open up the Ethernet Setup page, where you can install the printer.
First, select Search LAN for TSP100LAN.
Once your printer appears in the list below, confirm that the IP Address matches the IP Address on the Current IP Parameters Status receipt you printed earlier.
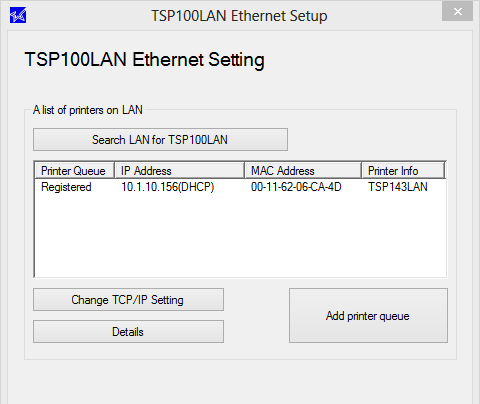
Click Add printer queue.
At this point you may receive a warning message like the one below:

If you receive this message it means your IP address is not fixed and may change in the future. This could cause your printer to disconnect so we recommend you contact your local IT specialist to get a Static IP setup. In the meantime, click Yes so you can start using your printer right away.
Next, you will see a new box where you can specify the queue and port names of your printer. Leave the port name unchanged and add a new queue name if you'd like your printer to be called something else.
Once you're happy with these settings, select Perform test printing and click Complete.
Your printer should now be set up and ready to go!
Perform a test print
Now that your printer is installed you can start using it to print your receipts in Retail POS.
To perform a test print, follow the steps below:
1. Navigate to Sell > Sales history
2. Click a sale to expand it
3. Click Print receipt
4. Select the receipt template you’d like to use
This will take you to the print preview screen. If the Star TSP100 is not your default printer, select the appropriate printer from the options. You will also want to untick headers and footers and set the paper size to 72mm - 2000mm or 72mm - receipt.
If you set your paper size to 72mm - 2000mm or 72mm — receipt without disabling headers and footers, the printer will not auto cut at the main receipt
Once that's been changed you should be able to print out a receipt.
Set up your cash drawer
Once the printer is set up, you can connect the cash drawer.
The cash drawer connects to your receipt printer and is triggered to open when you finish cash and the receipt is printed by the printer.
To set up the cash drawer:
1. Plug the RJ12 connector cable from the cash drawer into the receipt printer.
2. Next, head to your Devices and Printers window on your computer.
3. Right-click on your receipt printer, and select Printer Properties > Device Settings.
4. Once in here change the Peripheral Unit Type to Cash Drawer and set the Unit 1 and 2 options to Document Bottom.
If you want your cash drawer to fire before the receipt prints you can set the Unit 1 and 2 options to Document Top.
5. Save these settings and test them out by performing a test sale.
-
Setting up the Star TSP100/TSP143IV for iPad
1. Open the Retail POS app > Settings > Hardware.
2. Connect the Star STP100/143 to a power source using the provided power cable.
3. Connect your LAN (Ethernet) cable from your printer to the router or wall. Turn on your printer and tap Add printer. The search for your printer will begin.
4. Under Connected printers, select your printer model and tap Next.
5. Your printer is now added and paired with Retail POS. You can choose to rename your printer, perform a Test print, or tap Finish.
Perform a test print
Now that your printer is installed you can start using it to print your receipts in Retail POS.
To perform a test print, follow the steps below:
1. Tap the Menu icon (☰) to open the sidebar and select Sales history.
2. Tap a sale to expand it.
3. Tap Print receipt.
4. Select the receipt template you’d like to use and tap Print.
Set up your cash drawer
Once the printer is set up, you can connect the cash drawer.
The cash drawer connects to your receipt printer and is triggered to open when you finish a cash sale and the receipt is printed by the printer.
To set up the cash drawer, open up the Retail POS app and follow the instructions below:
1. Tap the Menu icon (☰) to open the sidebar
2. Tap Settings and choose Hardware
3. Select the printer you want to attach the cash drawer to
4. Plug the RJ12 connector cable from the cash drawer into the receipt printer.
5. On the printer settings page, toggle the Cash drawer enabled setting to On
6. Toggle the Open cash on sale setting to On