What you need
In order to set up your receipt printer, you'll first need to make sure you have the following:
- Test roll included
- Full rolls sold separately
Cash drawer (optional)
You may also wish to set up your cash drawer at the same time. To do this, you'll need a specialized cash drawer cable. This is similar to an Ethernet cable but is smaller on one end.
-
Downloading and installing the Epson driver for Mac
- Download the latest printer drivers (specialized software that helps the printer run correctly on your computer) for your TM-m30II or TM-m30II-NT.
- Check the box next to Agree to the Software License.
- Click the Download button next to the Printer Driver for [your operating system].
- When the download is complete, open Finder and navigate to the Downloads folder. Double-click the file to extract it.
- Next, open the extracted folder of the same name.
- Double-click the .dmg file and the .pkg file
- Follow the installation guide instructions to install the driver.
Installing your Epson printer
Now that you have installed the printer driver, you will need to install the printer itself on your Mac.
- Navigate to System Preferences and open Printers and Scanners.
- Click the plus (+) icon to add a new printer.
- Select the IP icon (represented by a globe).
- Enter the requested information:
-
Address: This is where you need to enter your printer's IP address. To find this, you will need to switch the printer off and turn it back on and wait 10-15 seconds until the network configuration slip is printed. Ensure that Ethernet (LAN) cable is connected to your device and the printer before attempting to print the IP address.
- Protocol: Select Line Printer Daemon - LPD from the dropdown.
- Queue: Leave this blank.
- Name: This is an optional field. If you would like to customize the name of your receipt printer, enter it here.
- Location: Leave this blank.
-
Address: This is where you need to enter your printer's IP address. To find this, you will need to switch the printer off and turn it back on and wait 10-15 seconds until the network configuration slip is printed. Ensure that Ethernet (LAN) cable is connected to your device and the printer before attempting to print the IP address.
- Click the Use dropdown and click Select Software...
- Search for Epson using the Filter field and select the EPSON TM Thermal (203dpi) option, then click OK.
- Click Add. Your printer should now be set up and ready to go.
Enable Receipt Cutting
Once a receipt is printed, your Epson printer needs to be set to automatically cut the receipt from the paper roll. To do this, follow these steps:
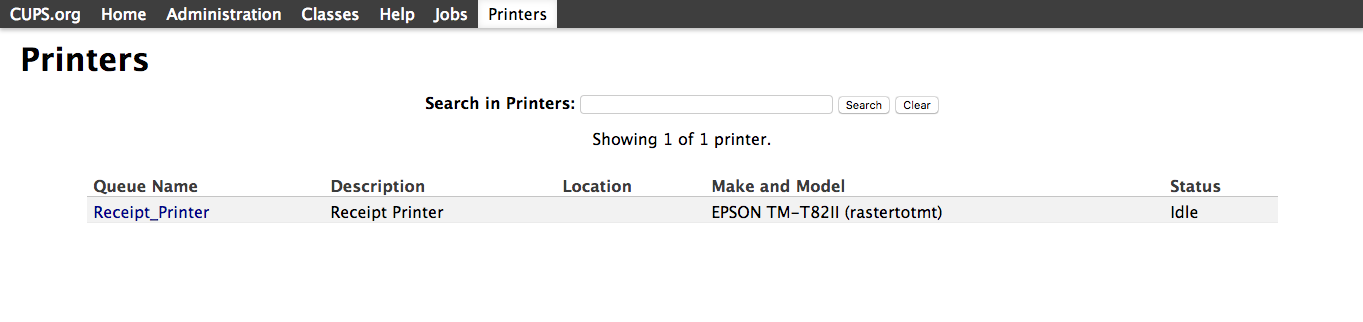
- Head to the following URL: http://localhost:631/printers/. This will take you to CUPS. CUPS is a network printing service used by Mac computers. It allows you to setup your printers on a network, and customize options such as cash drawer setup.
- Once in CUPS, Select your printer model (TM-m30II or TM-m30II-NT) from the list.
- Select Set Default Options
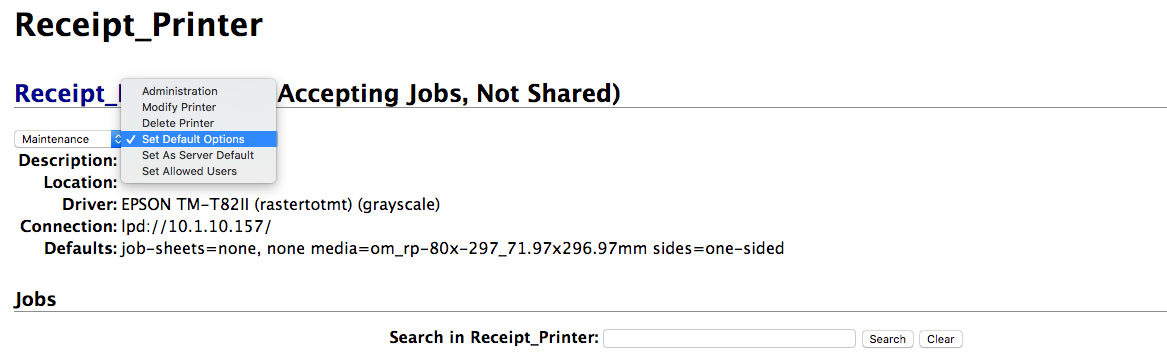
- Under Paper Cut, select Cut Per Page from the dropdown menu.
- Click Set Default Options.
Connecting the cash drawer (optional)
Once you've set up the printer, you can connect a cash drawer.
The cash drawer connects to your receipt printer and is triggered to open when you finish a cash or check sale, and the printer prints the receipt.
To set up the cash drawer:
- Plug the RJ12 connector cable from the cash drawer into the receipt printer.
- Go to http://localhost:631/printers/
- Once in CUPS, select your printer model (TM-m30II or TM-m30II-NT) from the list.
- Select Set Default Options from the dropdown menu.
- Under Buzzer/Cash Drawer Control choose Open Drawer #1.
- Click the Set Default Options button to complete.
Your cash drawer should now be all set to go. You can test it by printing a receipt from the Sales history.
Perform a test print
Now that your Epson TM-m30II or TM-m30II-NT is installed you can start using it to print your receipts in Retail POS.
To perform a test print:
- Navigate to Sell > Sales history.
- Click a sale to expand it.
- Click Print receipt.
- Select the receipt template you’d like to use.
This will take you to the print preview screen. If the Epson is not your default printer, click Change and select the printer from the list.
Once that's been changed, you should be able to print out a receipt.
-
Downloading and installing the Epson driver for Windows
- Download the latest printer drivers (specialized software that helps the printer run correctly on your computer) for your TM-m30II or TM-m30II-NT.
- Check the box next to Agree to the Software License.
- Click the Download button next to the Printer Driver for [your operating system].
- When this download is completed, go to your Downloads folder, right-click on the file, and select Extract All...
- After extracting the file, a new folder will open. Double-click on the install and follow the installation guide instructions.
- Once installed you will see a confirmation box. Close this and continue to the next step.
Installing your Epson Printer
You will be brought to the printer setup screen where you'll need to input the following information:
- Model: Select Epson TM-m30II or TM-m30II-NT.
- Name: Type in a name of your choice or leave as default.
- Port Type: Set this to Ethernet.
- Port: Leave this as Auto setup.
-
IP Address: This is where you need to enter your printer's IP address. To find this you will need to switch the printer off and turn it back on. Wait for a few seconds until the network configuration slip is printed.
Once you've filled out these fields, click Save Settings and hit Next to complete the setup.
Perform a test print
Now that your Epson TM-m30II or TM-m30II-NT is installed you can start using it to print your receipts in Retail POS.
To perform a test print:
- Navigate to Sell > Sales history in Retail POS.
- Click a sale to expand it.
- Click Print Receipt.
- Select the receipt template you’d like to use.
This will take you to the print preview screen. If the Epson is not your default printer, click Change and select the printer from the list.
Once that's been changed you should be able to print out a receipt.
Connecting the cash drawer (optional)
Once you've got the printer set up, you can connect the cash drawer.
The cash drawer connects to your receipt printer and is triggered to open when you finish a cash or check sale and the receipt is printed by the printer.
To set up the cash drawer:
- Plug the RJ12 connector cable from the cash drawer into the receipt printer.
- Next, navigate to your Devices and Printers window on your computer.
- Right-click on your receipt printer, and select Printing preferences > Peripherals. For Windows 10, click on the printer name and then click Manage to open Printing preferences.
- Use the Peripherals dropdown menu to select Cash Drawer.
- Select End of Document and click Open for both Cash Drawer #1 and Cash Drawer #2.
If you want your cash drawer to fire before the receipt prints, select the Start of Document option instead.
- Click Apply.
You can now test by performing a test print.
Perform a test print
Now that your Epson TM-m30II or TM-m30II-NT is installed, you can start using it to print your receipts in Retail POS.
To perform a test print:
- Navigate to Sell > Sales history.
- Click a sale to expand it.
- Click Print Receipt.
- Select the receipt template you’d like to use.
This will take you to the print preview screen. If the Epson is not your default printer, click Change and select the printer from the list.
Once that's been changed, you should be able to print out a receipt.
-
Connecting your TM-m30II to Retail POS on iPad
Please ensure that the Ethernet cable is plugged into the back of your printer before continuing to print the IP address.
- On your iPad, check that you are connected to the WiFi connection in your store.
This step is not required with the Epson TM-m30II-NT if you are using the network tethering (USB Lightning connection). Your iPad will have the Ethernet option available in your local network in the Settings section.
- Open the Retail POS app and tap the Menu icon (☰).
- Select Settings > Hardware.
-
Receipt printers, tap Add a printer.
- A pop-up window will appear. The Find a printer that's ready to add option will search and show printers that are already connected to the network. Your printer will be listed under connected printers.
If your printer is not on the network, tap Follow steps to connect and add a printer.
- Perform a hardware self-test by following the on-screen instructions and tap Next.
- Select your printer brand and model.
- Select your printer's connection type and tap Next.
- Follow the on-screen instructions depending on your connection type and tap Add printer once completed.
- Confirm the printer you want to add by selecting it under connected printers and tap Next.
- Your printer is now added and paired with Retail POS. You can choose to rename your printer, perform a Test print, or tap Finish.
Connecting the cash drawer (optional)
Once you've got the printer set up, you can connect the cash drawer.
The cash drawer connects to your receipt printer and is triggered to open when you finish a cash or check sale, and the printer prints the receipt. A manager or admin can also manually open the cash drawer directly within Retail POS.
To set up the cash drawer:
- Open the Retail POS app.
- Tap the Menu icon (☰) to open the sidebar.
- Tap Settings and choose Hardware.
- Select the printer you want to attach the cash drawer to.
- Plug the RJ12 connector cable from the cash drawer into the receipt printer.
- On the printer settings page, toggle the Cash drawer enabled setting to On.
- Toggle the Open cash on sale setting to On.
Perform a test print
Now that your Epson TM-m30II or TM-m30II-NT is installed, you can start using it to print your receipts in Retail POS.
To perform a test print:
- Navigate to Sell > Sales history.
- Click a sale to expand it.
- Click Print Receipt.
- Select the receipt template you’d like to use.
This will take you to the print preview screen. If the Epson is not your default printer, click Change and select the printer from the list.
Once that's been changed, you should be able to print out a receipt.
- On your iPad, check that you are connected to the WiFi connection in your store.