Setting up your Worldpay TriPOS Terminal
Before setting up Worldpay triPOS with Retail POS, you will need to power on your terminal and connect it to the internet.
To connect your Worldpay terminal to the internet, follow the steps below:
1. Plug your terminal into a power source and check whether your terminal requires an ethernet cable connection or is WIFI enabled.
-
If you are using an ethernet cable, plug the ethernet cable from the terminal into a nearby router or switch. For the Verifone MX915/925, the ethernet cable must be plugged into the ethernet port closest to the power plug on the terminal.
-
The Ingenico iSMP4 and Link 2500 is a WiFi enabled Worldpay terminal, follow the steps at this link to connect your terminal to your WiFi network.
2. Next, wait for the activation code to display on screen. Once the activation code appears on the screen, you will be ready to proceed. Make a note of this activation code as you will need it for later.
Note
-
If the activation code does not display, then the terminal is not connected to the internet. Check to make sure that your ethernet cable is fully connected.
-
For security reasons, this activation code will refresh after 15 minutes, so be sure to recheck your terminal screen for the latest code when you come to pair this terminal with Retail POS.
Setting up the Worldpay Payment Type
Now that you have powered on and connected your Worldpay terminal, you are ready to set it up with Retail POS. To do this, follow the steps below:
1. First, Login to your admin user account for your Retail POS store on a Mac or PC.
2. Navigate to Setup -> Payment Types.
- If the Worldpay payment type is already listed on the Payment Types page, click to open it and skip ahead to step 5.
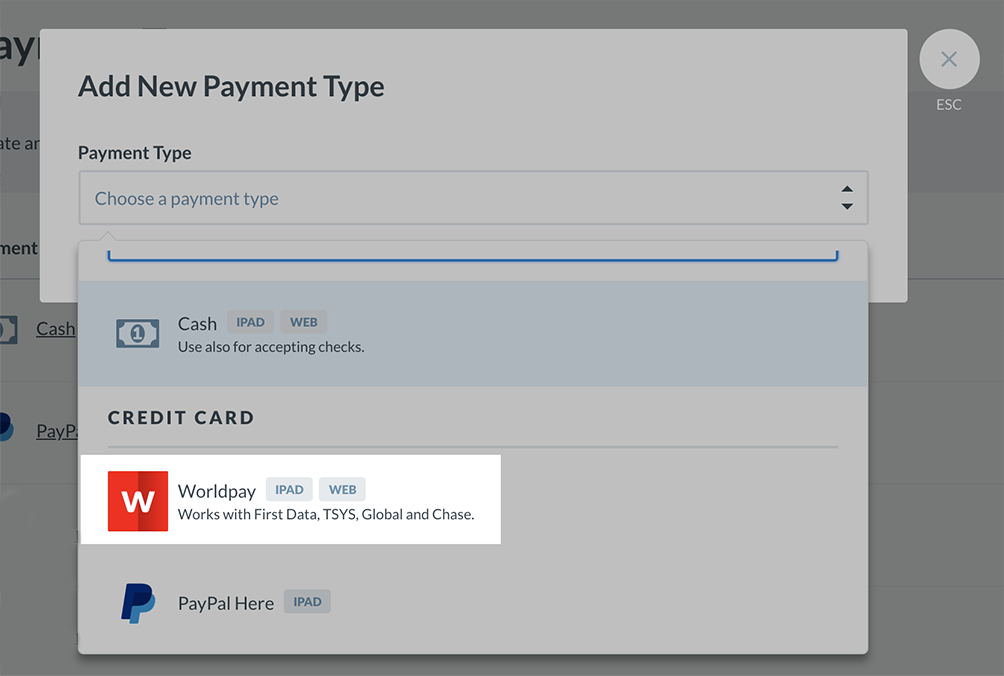
- If you do not yet have the Worldpay payment type listed on this page, click the Add Payment Type button and select Worldpay from the payment type drop-down.

3. Once on the new Payment Type screen, add a name for your terminal if you wish to do.
4. Signature capture is turned on by default, if you do not wish to accept payment by signature, deselect the Ask for Signatures checkbox to disable signature acceptance.
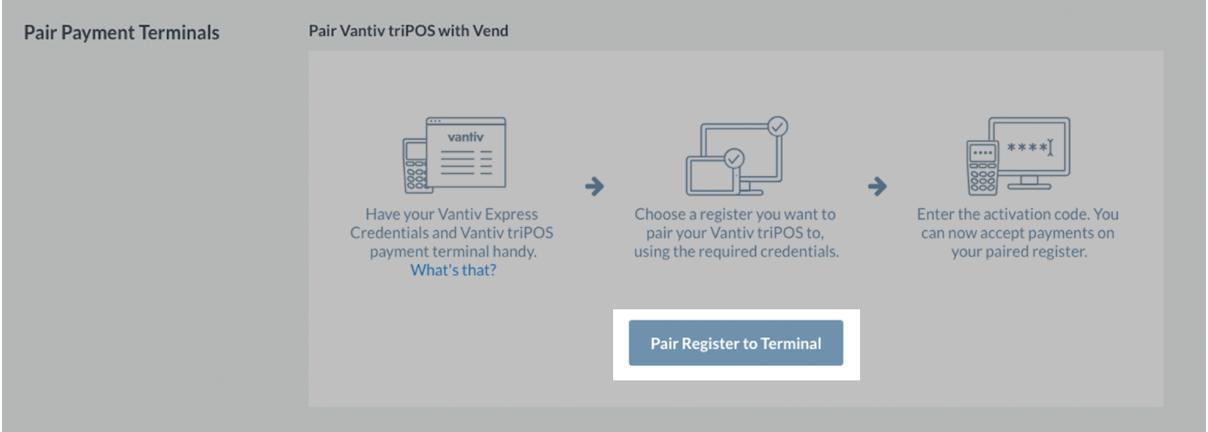
5. Scroll down and select Pair Register to Terminal

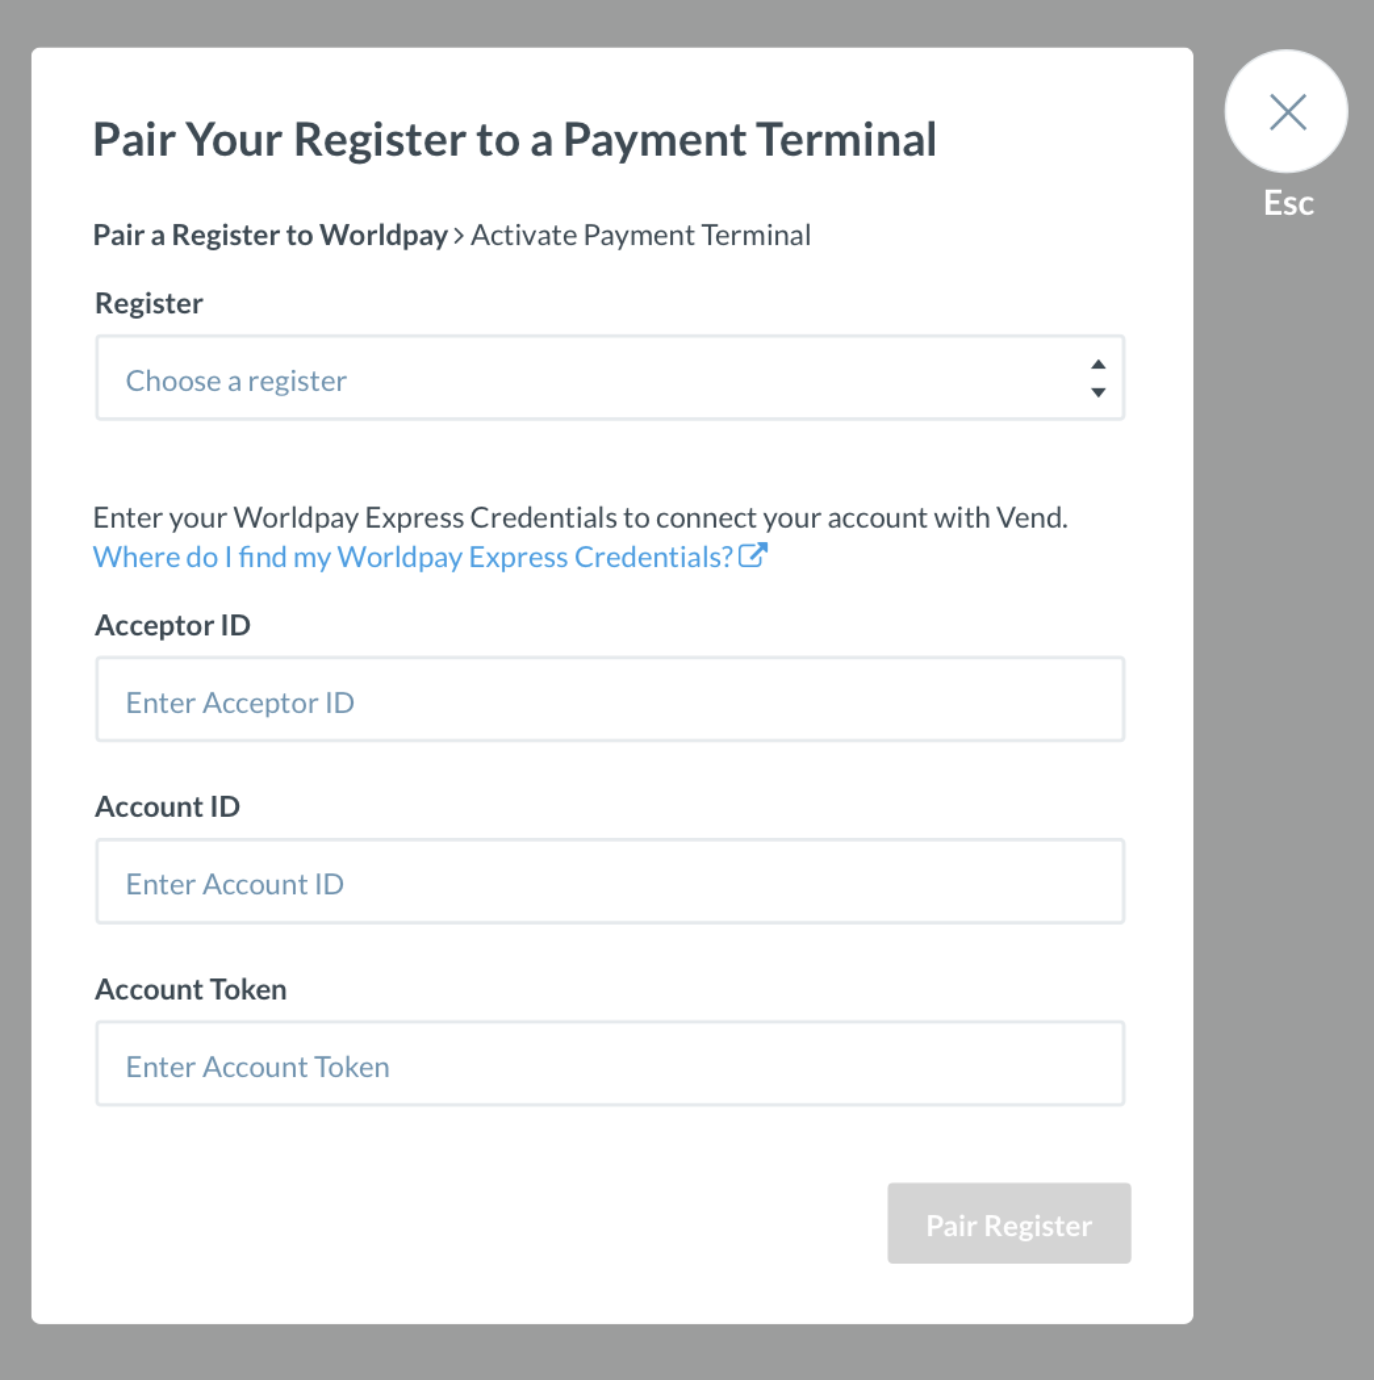
6. A dialogue box will appear. Choose which Retail POS register to pair this terminal to and then enter the Acceptor ID, Account ID, and Account Token (Account Credentials) you noted from the Account Credentials section above. Select Pair Register once all the fields are filled in.

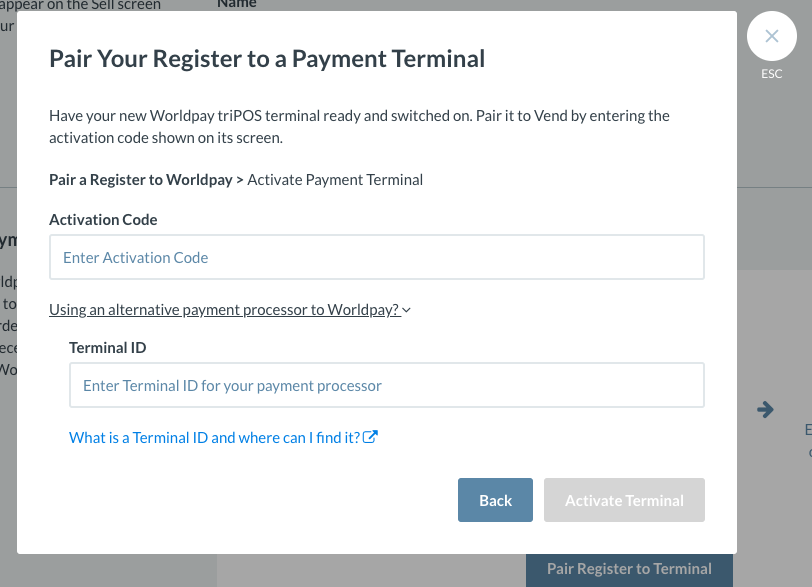
7. On the next screen enter the Activation code you noted earlier, from your Worldpay terminal screen, into Retail POS.

Note
If you have an alternative payment processor to Worldpay, such as Chase, First Data, Global or TSYS, enter the Terminal ID. If you do not know where to find your Terminal ID, check out this article.
8. Once you have entered the Activation Code, and if needed Terminal ID, select Activate Terminal.
9. You will now be ready to take payments with your Worldpay terminal.
Taking payment with Worldpay
1. Navigate to the sell screen and process a sale as usual.
2. When presented with your payment options, select Worldpay.
3. Retail POS will connect to your payment terminal and allow your customer to pay for their transaction.
Note
If you cancel or your customer cancels the digital signing step, the terminal will print a receipt for your customer to sign.Terminal Troubleshooting
If at any time you are unable to process payments on your terminal, you can still take payments with Worldpay and Retail POS by using a Virtual Worldpay Terminal. For more information on how to set up a Virtual Worldpay Terminal check out this link.
What are the triPOS URL and port requirements?
1. Allow outbound https port 443 traffic to https://tripos.vantiv.com
2. Allow TCP/IP (TLS1.2) traffic to port 9001 of https://device.tripos.vantiv.com
What do I do if the terminal does not display an activation code?
Validate that your connection to the triPOS Cloud service is not being blocked or restricted via the instructions below. If this does not work, head to the section below on What do I do if I receive an error when attempting to pair?. If it does work, follow the steps below
1. Open your internet browser and enter the following URL (use Cert or Production URL): https://device.tripos.vantiv.com:9001
2. This will start an SSL handshake with the triPOS Server on the port that terminals use.
3. You should get a pop-up window on your internet browser.
4. If you do not get this pop-up window it means traffic is being blocked somewhere and you are unable to initiate an SSL handshake on port 9001. Contact your IT person to help solve this.
What do I do if I receive an error when attempting to pair?
1. Validate that you entered in the appropriate Activation Code, which should begin with a “P” and followed by 6 numeric digits.
2. Ensure the date/time on the terminal are correct:
-
Ingenico
1. Reboot the terminal.
2. When the RBA information screen appears, type 2 6 3 4 ENTER.
3. Press F or + to get the Menu.
4. Press F for Menu.
5. Press 0 for Telium Manager.
6. Press 3 for Initialization.
7. Press 1 for Parameters.
8. Select Date and Time and press Enter.
9. Select Set Date and press Enter.
10. Restart terminal application by holding down the yellow Clear key and the minus key on the keypad.
-
Verifone
1. Press 1+5+9 (all at the same time) and wait for the system mode password prompt.
2. The password is 1 6 6 8 3 2.
3. Press the Administration tab.
4. Press the Date/Time tab.
5. Adjust Date/Time to current local time, and press Apply.
6. Press Home tab and then press Reboot.
Important
Worldpay triPOS terminals do not have a standalone mode.
Retail POS does not support Voice Authorisation transactions.